At the request of a member of my ScrapperCreations list, I am posting photos that show how chipboard cut with a cutter can be used and what you can do to the pieces to use them in projects.


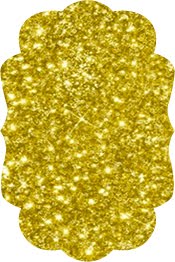
I glued paper on after cutting out the chipboard, filed the edges, inked the edges, ran the piece through my Cuttlebug with an embossing folder and covered it with Crackle Accents. I spread the Crackle Accents with my finger and let the piece dry overnight.


I used the same techniques for this piece and the next piece.


I don't remember the name of the paper collection, but it was by Fancy Pants.

Note that the scalloped piece was cut from recycled plastic packaging and I cut the same shape from matching paper and put it beneath the clear plastic. You can see some white swirls next to the heart -- these are white Staz-On ink stamped on the plastic.

The smaller blue and red hearts and I Love You are rub-ons. I dressed up the letters a bit by doodling dots with my white gel pen.

This project was a special Valentine's card I made for my husband.
I am working on my son's baby album. I don't have many pictures because I did not have a camera in those days and digital cameras did not exist yet. The album size is 8" x 8". I find this size more challenging because photos usually take up a large space, but the few pictures I have are fairly small or can be cropped to work in this size.

I used various sticker elements from my stash of mainly Echo Park and Bella Blvd. collections.

I tried some stitching on the semi-circles at the ends, but it did not work out so well on thick paper so I covered up my mistakes with some punched circles. That's one of the fun things of this hobby -- figuring out how to cover up the mistakes you want to hide :)

I punched some multi-coloured circles for the side of the photo and just glued them on.

The circle with cars and the LITTLE BOY stickers was cut with my circle cutter and then I cut a circle out of the same size in vellum to tone down the colours here because I originally wanted to write something on here. It was actually still a bit to busy for handwritten journaling so I used some stickers. I also stitched around this circle with my sewing machine. I used a shiny embroidery thread, but because it is dark blue, that doesn't show.

The brads at the bottom left are stamped with little stars. I used black Staz-On and coloured in the stars with Copic markers.
Robin, My Pink Stamper, is having a Pinkalicious Blog Hop and her daughter Katelyn is celebrating her birthday so she is having a challenge in which you need to create "anything birthday". Since I need to practice my card-making skills, I made this card for Katelyn. Happy Birthday Katelyn!!!


I used my Cricut Wall Décor and More cartridge to cut out the butterfly, the Kaisercraft Bubble Gum Hills Collection 6-1/2" paper pad and a paper doily from Wilton. Light purple Stickles and gems are the finishing touches. The card base is 4-1/4" x 4-1/4" square. I also used my Fiskars scallop punch, two teeny-tiny punches from Stampin' Up and a couple of Spellbinders label dies. The sentiment is a rub-on from my stash.
One of my Scrappin' Sistas organized an all-day crop this weekend and we had a fantastic time. The hall she rented is huge -- big enough that we could each have an entire table and there were still enough tables free to sit and eat. She plans to organize more soon and I'm really looking forward to them!!!!

This is another layout inspired by Nichol Magouirk. The photo is a class picture with my son taken 27 years ago.


It was funny because when I glued all the strips onto the page, I thought it looked terrible, but once I added all the other elements, I really liked the result.

I used both my Cricut and Silhouette machines on this layout. I cut the clouds with the Create a Critter Cricut cartridge and the word Elementary with my Silhouette.