Showing posts with label Silhouette Studio Version 3. Show all posts

I am a visual person and don't do well following written instructions, but I have received so many requests for a written tutorial of this technique that I felt I needed to do this too.


The first thing you need to do is decide on your text and image.

Certain letters work better than others. For example, the letters P, F, C, J, K, T, V and Y don't work very well so you will want to use words that do not have these letters in the middle. Other letters like A, E, G, O and U are also a bit tricky.

Obviously, sometimes you have no choice but to use these letters. This is why it is best to use images that don't have too much detail. In the PANTHER PRIDE example above, the letter T is right in the middle of the word, but it still works well because the image is solid enough.

Notice the gap between the P and R in the 2nd word. That would be a problem if the P were in the middle of the word, but since it's at the end and the image doesn't reach that far, it doesn't matter at all.

You will need to manipulate your letters and image to make it work well.

You can click any of the images below to display larger versions.

In the image above, I typed my text and then selected my font.

Impact font works very well because it's a nice chunky font that fills in very well.


I stretched out my text as large as possible on my mat to make it easy to see everything.

I need to make sure my letters fit nice and closely together (kerning) and that the lines are nice and snug too.


I have decreased the spacing as much as I can this way. Note that you can achieve what you need with the Line Spacing option, but for the best character spacing, you need to ungroup and manually move your letters for the best placement.


With your text selected, right click and choose Ungroup.
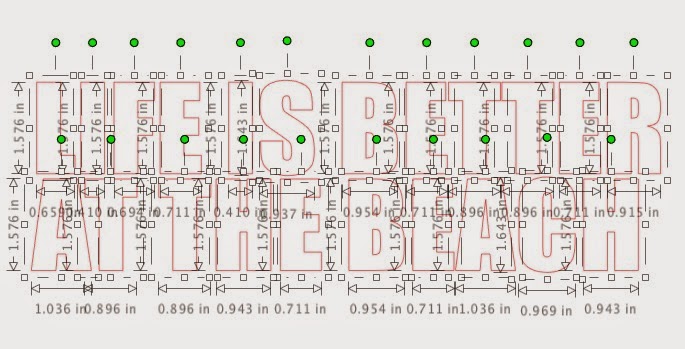
Don't panic when you see this. Just click on another area on your mat.

Just select a letter with your mouse and then using the arrow keys on your keyboard, move all the letters nice and close together. Leave only enough space between the words to be able to distinguish the words.

You can save a lot of time by moving all the letters in one word close together and then grouping the letters in that word and moving them next to the other words.

For example, I moved all the letters in the word "BETTER" close together. I grouped the letters and then moved the word "BETTER" to the left, next to the word "IS". Again, I used the arrow keys on my keyboard to move the word to the left so that I don't move the letters up and down.


Continue until all your letters and words are close together.


Group your top words together.

Group your bottom words together.

Now I turned the grid on so I can line up the left edges of my text. You can see a small gap on the right of the word "BEACH". I need to close that gap by selecting the text and dragging to the right, making that line of text slightly wider.

At this point, drag your text wider or taller until you are happy with the look. It won't look perfect because this is not good spacing for reading. You will need to imagine how the text will look once you add the image.

You might like the look of one line being taller than the other and you might not. This is entirely up to you, depending on what you like.

Once you are happy with the text, turn off the grid and group both lines by selecting the two lines, right clicking and selecting Group.

Now I will need to select the image I want to use. I have decided on using an image that looks like the sun.
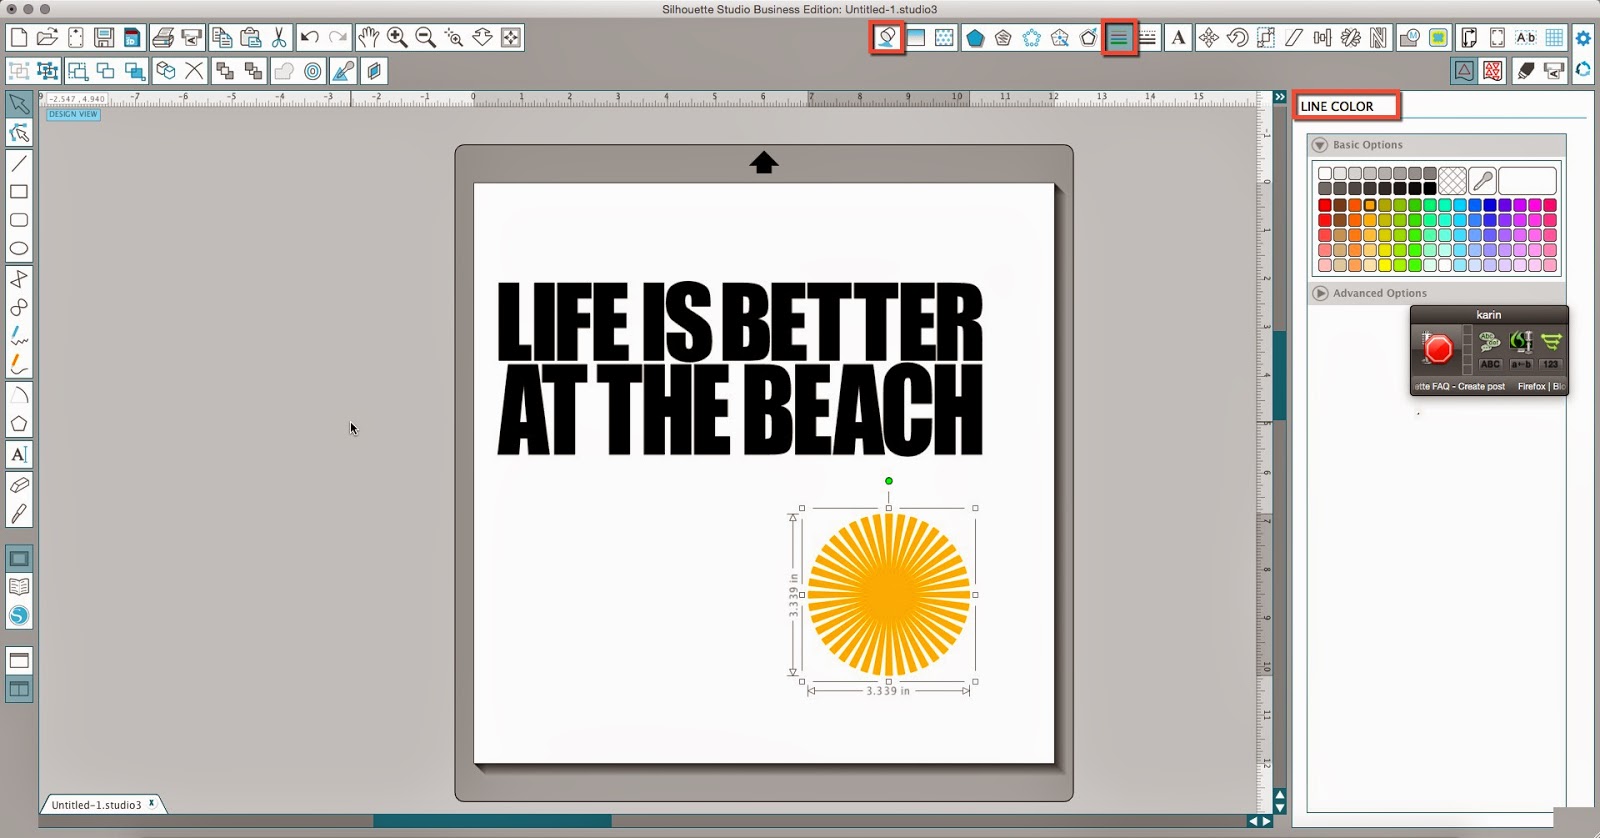
I have added fill and line colours to the text and my image so that it will be easier for you to see them once I place the sun on top of the text.

The image above shows you the icons for changing the fill colour, which is the paint bucket, and the line icon to change the colour of your lines.


I have placed the sun on my text, but if you look closely, you will see that there is quite a gap where the 2 letter Ts are in the word BETTER.

I feel the technique will work better with the sun placed in the middle of the text, as shown above.

Before you move on to the next step, be absolutely sure that all of your text is grouped together. The technique will not work if your text is not grouped together.

Make sure your shape is on top of your text. Group your text and the shape.

Copy the grouped items to your clipboard

Paste to make a 2nd set

Move the 2nd set away from the first

Ungroup the first set only once. Remember your text must remain grouped.

Ungroup the second set only once as well.
With the first group selected, open your Modify window. Choose Crop.

Dont' panic


With all those parts selected, right click and choose Group

This is how it will look once it's grouped


With the second set selected, choose Subtract
Don't hyperventilate. With everything selected, right click and choose Group.


It will look like this.

I changed the colour of the sun portion so you can see the parts.

Move the sun portion into place and then Zoom In

Now you can easily move the shape where it should be.


You're done. 

You can also follow along with my video. In my video, I also show you how to create registration marks so you can cut the layers separately and line them up once they are cut.


Note that if you would like me to create a file for you, you can request a Custom design here.

In this Silhouette Cameo tutorial, I teach you how to use Tagul to create word art and then draw a line around the shape in Silhouette Studio to print and cut the design. I also walk you through downloading and installing the firmware update for the updated Cameo. Note that you need the firmware update to do print and cut projects with the new Cameo.


Cropping a photo in Silhouette Studio is super easy.

First, open your picture in Silhouette Studio using the File, Open command. It may come in very large. My photos are huge because I use the max resolution settings on my cameras. Just select the image and adjust the size by dragging the handles to make it smaller.


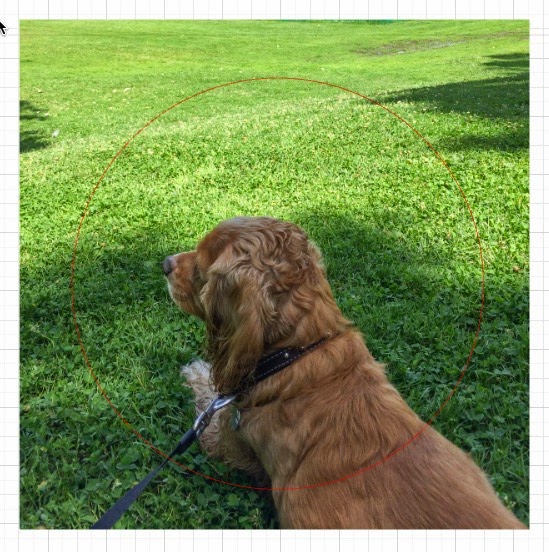
Select the shape you want and place it over the picture in the area you want. Here, I used an ellipse and drew a circle over the area I want to keep.


You can see the red line that represents the circle, but you can use any shape you like (either using the drawing tools in Silhouette Studio or by opening a cutting file).

Next, select everything (your picture and the cut line), then click the Modify icon at the top of the screen.


Now click the Crop icon.


Your photo will be cropped to the shape.


You do exactly the same thing to crop using a cutting file.

Below I chose a heart from my library.


After cropping, my photo of Percy is cropped to the heart shape.


Note that I used Silhouette Studio 3 for my tutorial, but this technique works for all versions of Silhouette Studio.

Be sure to follow my blog for many more tips and tricks.

I had originally posted a video explaining this technique using Silhouette Studio, but it is so popular, I was asked to teach the technique using SCAL as well so that all my Cricut friends can also create a file like this and cut it with their Cricut Explore.

So many people have been posting pictures of t-shirts and hoodies they decorated with this technique and it's really fun to be able to share the information.

The video below shows you how this is done.


If you missed my video on using this technique with Silhouette Studio, I am posting it again below.


If you would like to have my MAN'S BEST FRIEND cutting file, it is available in my Etsy store

You can use Silhouette studio to create a very cool effect.

In the video below, I teach you how to knock shapes out of text using Silhouette Studio. This is not putting an image on text, but actually knocking out the text in the shape of an object.

I also teach you how to create and place registration marks so that when you cut this from vinyl, you can line everything up perfectly.


UPDATE: One member commented that it would be better to do the internal offset of the shape before you crop. I agree because if you do this first, you don't end up with skinnier letters in that section.


In this video, I used offset, compound path, the knife and welding to create a custom shape to help someone in my Silhouette group.